Showing posts with label Gift Idea. Show all posts

Tuesday, November 29, 2016

Minion Ornament

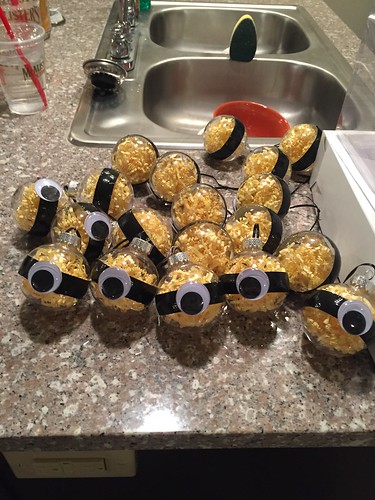
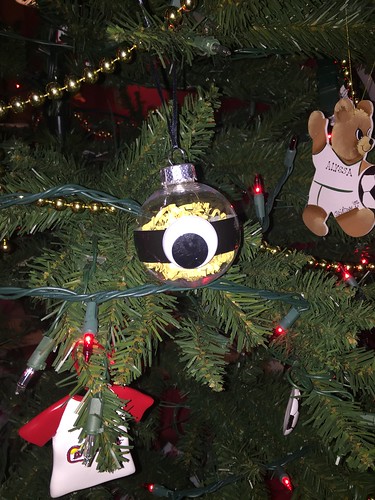
Ready for the easiest gift to make ever??? Well, lay your eyes on this Minion ornament!

image

Last year, I made Teenage Mutant Ninja Turtle ornaments. They turned out super cute but by the end of the project, I had no fingertips left because I'm burnt them so much by hot gluing the ribbon on. A stroke of genius hit me when I was at Hobby Lobby shopping for the supplies and turned this into the simplest project ever! Here's a step by step guide how to make your own!

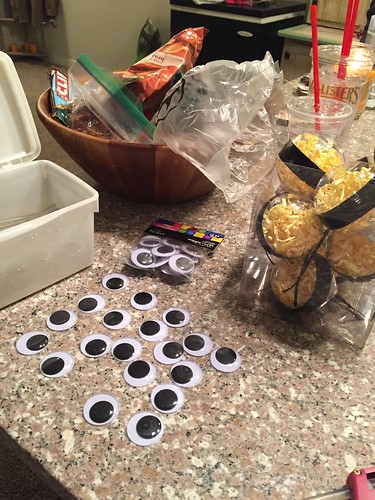
Supplies
Clear ornaments  
4 containers of 8 @ $3.99=$15.96
Black Duct Tape (Mini roll)
2 rolls=$3.58
Googly Eyes
2 bags=$5.98
Yellow Shredded Paper
2 bags=$2
Black Ribbon
$3.99
TOTAL: $31.51 for 32 ornaments=98 cents each!

Step 1:
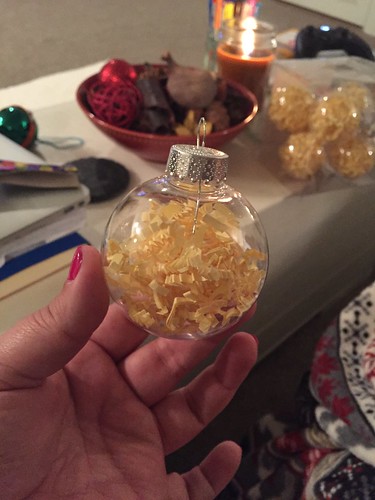
Stuff yellow shredded paper into clear ornament.

image

So far pretty easy, right?

image

Step 2 & 3: 
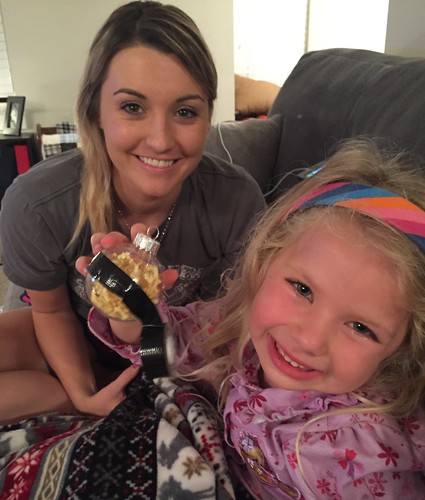
Take black duct tape and wrap around the center of the ornament. I did this task while Deven worked on step 3 which was to cut black ribbon (or whatever color you'd like) and tied them on to the ornaments so they could hang on the tree. 

image

Step 4: 
Heat up the hot glue gun and glue on the googly eye.

image

Step 5: 
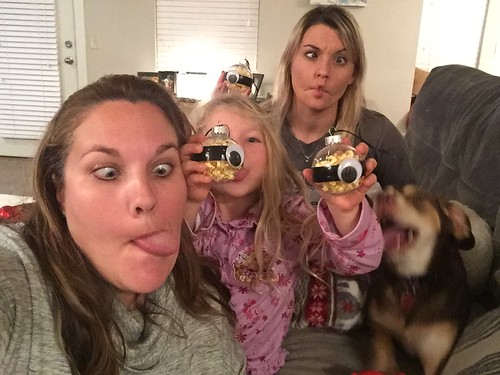
Go a little crazy because you're done!

image

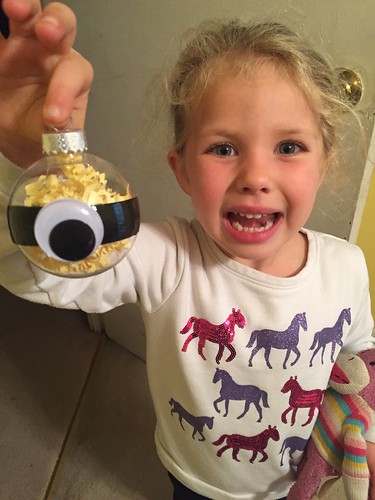
Seriously, how simple was that? And they're adorable! We made enough for each person in her class at school, the kids at the sitter's plus our neighbors, friends, and whoever else we'd like to give them to! 

image


Step 6:
Save one for yourself and hang on your own tree!

image

Happy crafting!

Saturday, December 21, 2013

Bath Bombs!!!

...A few weeks ago, I did a post on an ebook series I'd received called Soap Making Made Easy. Well, my supplies for my bath bombs FINALLY arrived. They were delivered last Sunday by FedEx, the driver told me it was a special Sunday delivery! I promptly tore into the box anxious to get started. So without further ado, I'll share the recipe with you!

Ingredients
1 part citric acid
2 parts baking soda
Witch Hazel
Colorant
Fragrance
Dome-shaped mold (I used mini-cupcake tins)

Here's a pic of the ingredients plus the laptop to follow directions!
DSC_6989

Directions
1. Blend citric acid and baking soda. Make sure there are no clumps. You may want to use a stick blender, but I just used a regular old whisk.

2. Add the colorant to the mixture. Don't add too much or it'll change your bath water colors. You only need a drizzle of the colorant.
DSC_6991

3. Add desired amount of fragance. Note: A little goes a LONG way! As in our whole house smelled like a tropical paradise for a week.

4. Use a squirt bottle to spritz the witch hazel onto the surface of the mixture, while hand-stirring with the other hand.

5. Once the mixture starts to become sticky, it is ready to mold. Don't add too much witch hazel or the mixture will begin fizzing. Trust me, this happens-we ended up with a whole pan in the bathtub and our house smelling yummy. See, this is what happens when there's too much witch hazel and it just keeps GROWING and GROWING! AR took a nice, fizzy bubble bath in the middle of the afternoon.
DSC_6992

6. Let the mixture sit in the tins/mold for 10 minutes. Then let them air dry for 3-4 hours (or overnight).

DSC_6990
Here there are popped out. Then did flat and become a bit more round as they dried.
DSC_6993
I went to the Dollar Store and bought this gift cartons which held two bath bombs and added them to gift cards I'd gotten for people.
DSC_7031
Now, make your own and go enjoy a nice, long bath!

Thursday, December 19, 2013

DIY Reindeer Gift Bags...

...Today is AR's last day at the sitter's before Christmas. We're taking Ms. Pam's and the other kids' gifts today. Last week, I made reindeer gift bags for all the kids. It was super easy, cheap, and cute!
 
Supplies (this will make 8 bags)
8 Brown Paper Sacks
1/2 sheet of red construction paper
2 sheets of brown construction paper
Rubber Cement (or adhesive of your choice)
Black Marker
 
Step 1: Take brown paper sack and round out top.
Step 2: Fold bag in half and draw on eyes with black marker.
Step 3: Take the piece you cut off and cut two ears.
Step 4: Take red construction paper and make 8 circles for the nose.
Step 5: Take brown construction paper and make antlers, I freehanded mine.
Step 6: Glue it all in place!
 
Here's a picture of everything cut out before gluing on:
DSC_6889
Finished product! So, I'm not a great eye drawer and all my reindeer look a little cross-eyed, but hey, it gives them personality! 
DSC_6893
I put candy in the bags for the babysitter's kids who are in middle and high school. For the younger kids, I put a container of trail mix with all of AR's favorite snacks: pretzels, marshmallows, craisins and M&M's. She loves Ms. Pam and all the kids there so I'm sure she'll have a blast playing with them today! I hope I can burn off as much energy at home with her as they do there.

Monday, December 2, 2013

Pampered Chef Giveaway!!!

...Still haven't decided on a Christmas gift for the chef in your life? Why not Pampered Chef? My good friend, Laura, had started selling their product and I'm having an online party from now until December 10. Go take a look at the awesome stuff they sell and try to tell me that you can't find a gift for that person in your life that loves to bake and cook!

Laura is graciously hosting this giveaway for a cookie press. This is valued at $32.50! It includes ten different metal disks so you can make a variety of different shaped cookies!

photo 1

photo 2
The giveaway will start today and run until midnight on December 10. Be sure to share the news with your friends about the giveaway and you can place your order in time for it to arrive by Christmas here!
a Rafflecopter giveaway

Friday, November 29, 2013

Black Friday Shopping...for the Hubby!

...Good Black Friday morning! I'm sure some of you are waiting in line, hopefully not freezing, waiting for your favorite store to open and find some great deals. While you wait, read today's guest post by Arianna from Arianna Knows Best. Happy shopping! FYI-I'm still in bed, snug as a bug!
 
Finding the Perfect Gift for Your Husband… and You!
If you are searching for ideas for holiday gifts for your husband this year, why not get him something that you can both benefit from? There are many gifts that fit this idea, so you are sure to find something that will be perfect for him.
If your loved one has been working hard all year and loves to travel, why not surprise him with a trip to somewhere tropical? Whether it’s a fancy trip to Miami or a low-key getaway to Hawaii, there are always deals to be found in the winter for vacations. You can have some quality couple time and can return home after your vacation relaxed and ready for the hustle and bustle of daily life!
Another unique gift idea that will benefit both is a subscription for a wine/beer of the month club. You both can enjoy this gift either during a romantic movie night or dinner at home. From international vineyards to a local winery, this gift will allow you to experience wine in ways you never did before. As a new bottle arrives every month, you may find a new variety that will become your new favorite wine!
Is your husband’s favorite striped tie starting to look a little frayed? Maybe take this as an opportunity to update his wardrobe ! Casually ask him what styles he likes to wear, as well as browse through his closet for inspiration. Buy him a nice suit jacket with a modern silhouette or a trendy, yet comfortable dress shirt. Not only will a new wardrobe give him a powerful ego boost in the office, but it will also spice up his date night looks as well!


If there is a new upscale restaurant in your area that has caught your eye, make reservations and celebrate the holidays with a romantic dinner. If your town has other holiday festivities as well, why not add these into your plans before? Catch an exclusive showing of a holiday play or watch a dazzling holiday lights parade. Not only will your husband enjoy a great steak dinner, but also you will get quality time without having to clean up! Adding in a holiday event before the meal might be a great way to start a holiday tradition that you can continue each year!
If you and your husband haven’t made exercise a priority this year, purchase a gym membership for the two of you. Not only will you both shed a few pounds, it’s a great way to spend extra time together after work or on the weekends. These are generally affordable programs, and many gyms also have extras such as a sauna or hot tub to help you relax after a hard workout!

Whichever option you choose, your husband is sure to appreciate any gift you give him this year. Take into consideration what he likes, then make sure it is something you both can use and appreciate. Ultimately, any chance to spend time together is the best gift of all!

Arianna_2012Arianna is a full-time mom and a fashion-lover, world traveler, animal lover, and family woman extraordinaire. She loves to cook and bake, travel to new places, share great fashion finds, and spend time doing crafts and projects at home with her kids. She’s got a crazy busy life, but she wouldn’t have it any other way! Follow her blog at http://ariannaknowsbest.blogspot.com/!

Tuesday, November 19, 2013

Painting with a Twist: Busch Stadium Style!!!

...this past Sunday, a group of sorority sisters, blog friends and co-workers met me at Painting with a Twist. It's a B.Y.O.B. art studio. They offer classes to the public but after I saw the Busch Stadium painting, I knew I had to do it for my dad for Christmas. They weren't planning on offering that painting again until spring training unless I wanted to do a private party. I sent out a mass FB message and the party was planned. Since I'm not a big drinker, I brought beer dip to share and one Angry Orchard Hard Cider then made my way to the big event!
 
If you see the finished product, it's very intimidating but they break it down section by section. At first, I was super stressed just by the sky but it got easier once we got the hang of what we were doing. Here's Q with her skyline and buildings.
DSC_6301
April showing off her talent. The picture on the right was originally mine. I traded paintings with the instructor because my buildings were too close together and I wanted a bigger Arch. Apparently, I thought I was in NY or something since I had drawn a massive skyscraper. 
DSC_6303
See, it's a process. Here's Danielle showing off half the infield painted and the stands. She is a perfectionist so hers turned out really awesome!
DSC_6306
Ta-da! Here is my finished product!
DSC_6308
Here's the entire group with their masterpiece! I suggested we add fireworks in the sky because that would signify a Cards win. I was too chicken to attempt it but a few others did and it turned out great.
DSC_6309
Me with Q and Durb, my college gal pals! It was awesome to see everyone and feel like a real Van Gogh while we're at it. I hope my dad is surprised when he opens it and hangs it in his office. I would love to do more classes here but then I ask myself, what would I do with all the paintings???
DSC_6314
I also decided to try out the new isABelt. It's a thin plastic belt that adjusts for almost all waist sizes, so no matter how much weight you gain or lose, you can still use the same belt. It has a magnetic clasp which sticks to your pants button to help keep it in place. I loved it because it didn't have any gap between my belt and pants, in fact, I forgot I even had it on! If you click on this picture to make it larger, you can see how much bulk is gone when you use the isABelt vs a regular belt and hey, who doesn't love to look skinnier?
Blog Pics
Check out the giveaway to get one of your own!

I received one or more of the products mentioned above for free using Tomoson.com. Regardless, I only recommend products or services I use personally and believe will be good for my readers.

Tuesday, October 22, 2013

AR's Homemade Christmas Presents...

...I have pinned so many things on my Baby G Board so I decided to make some time to get things done. There were so many projects to choose from and with the holidays coming up, I decided AR and I should get a head start on Christmas gifts. I found a few hand/footprint projects. First things first, I went to Hobby Lobby and bought 4 8x10 canvas for $8. I already had all the paint and brushes from other projects laying around the house.
 
DSC_5540
I painted the red, pink and brown the night before. Super easy! Then the next day after work, I took AR outside and painted her foot. She fought me the entire time and that's why the footprints on the V are both her left foot. Then we did her hand which she did better than I expected.

I did a quick L and E in lowercase cursive, wrote her initials and the year on the back and ta-da-done! Note to moms of toddlers: Strip your child down to do any type of painting if you don't want to get paint on their clothes. It was a bit chilly when we did so that's why my child is pantless but still wearing a jacket. She was asking me if I thought it looked alright. Of course it does, sweet AR!
DSC_5526
Next up was the ballerina tutu. I free hand drew the top of the leotard with a pencil on the canvas. Then I started painting pink for the top. Yes, I'm using AR's art tray, notice the Sesame Street coloring book? I had to do quite a few coats of the pink after letting it completely dry.
DSC_5514
As I stated above, my child isn't a fan of paint on her hands or feet but she was also feeling under the weather. Either way, footprints are much easier than handprints so I switched it up and made the tutu out of her footprints. I also decided to add a little more color by mixing in a few purple footprints. The purple one on the right got a little out of line, do you notice?
DSC_5550
My husband helped out by making the bow. Look at how concentrated he is!
DSC_5555
While he was making the bow, I sprinkled on some purple glitter. It came out VERY fast which is why there's so much. Then I sprayed hairspray over it. Once it dried, I outlined the top of the tutu in black Sharpie.

When the bow was finished, I hot glued a strip of ribbon across the waistband. Then I hot glued on the bow to cover up the purple footprint that got out of control.
 DSC_5575
And ta-da...our finished footprint tutu with a lot of purple glitter bling!
DSC_5578
The last project we attempted was a handprint tree with fingerprints. First, I traced her hand then painted it brown. Then we dipped her fingers in red, yellow and green paint and made dots all around the tree. Our finished product!
DSC_5722
These kind of projects are so easy but she hates it-lol! I hope it gets easier the older she gets. 

Monday, November 19, 2012

Sweet Treat from Treat!!!

...Treat is Shutterfly’s exciting new greeting card brand that makes it easy for people to create and send one-of-a-kind greeting cards. Think Christmas season coming up and who doesn't love personalized cards? It reminds me of when you'd go to the mall and they would type in the person's name so it was "personalized." We've really come a long way since then, eh? With AR, I'm thinking we'll do personalized birthday cards for the grandmas and grandpas because they're always asking for new pictures of her.

Treat has decided to give us a sweet treat: create and send a totally personalized greeting card from Treat for FREE. Go to their website www.treat.com and use this code: TREATBLOGR The offer is only good on Monday 11/19 & Tuesday 11/20 so don't miss out. Head over to www.treat.com and make your card! Be sure to let me know what kind of card you made. Happy personalizing!!!

Friday, October 19, 2012

Christmas Card Time!!!

...it's that time of year again to start thinking about Christmas cards. We're having family photos on 11/3 (first time EVER!) but I'm already cruising the Christmas Cards over at Shutterfly. I love all the bright, colorful ones like this:
 But I love this one even more because it's colorful and has multiple pictures. We're going to attempt one family shot of Matt, AR, me AND the dogs but let's be honest...we'll probably have to do MANY pics to get all of us in the card.
 
I'm also liking this traditional one:

There are still so many to go through before I find the "perfect" one! Be sure to check out their page of special offers. I've already purchased a few Christmas gifts from there because of the sweet deals they always offer. If the special offers aren't enough to entice you to go check it out, how about a giveaway? Giveaway prize: $50 off total order (does not include shipping & cannot be combined with any other promos).

To enter the giveaway, leave a comment letting me know what Christmas card or photo gift you'd purchase. Giveaway will close on Sunday, October 21 at 5:00pm CT. Winner will be chosen at random and announced on Monday, October 22.

Happy shopping for Christmas Cards!

*This post is sponsored by Shutterfly. Thanks Shutterfly!

Thursday, February 10, 2011

Little Bitty Lovies...

...my little Hay Hay, my neice, turned 7 this past weekend!?! That's bananas, I still remember driving through the snow storm across the state to be at the hospital when she was born, the time I babysat her at 4 months old and was giving her double water to formula-oops!, holding her to meet Fred Bird while she was screaming, me about to pass out from his B.O. and my sister crying because she was laughing so hard and all those memories are just from her first year!!!

So what do 7 year olds want for their birthdays? This 7 year old wanted a word search book and a towel wrap! Word search book-check, that was an easy find. The towel wrap I had no idea where to start so I decided to head over to Etsy. I found this great lady, whose actually in Missouri too, who made the cutest towel wraps! She makes tons of cute things other than towel wraps, if you want to check her out, her shop's name is Little Bitty Lovies.

One thing I love about ordering from Etsy is that the packaging is always so, so cute!!!

The final product! Tiffany blue towel with hot pink ribbon. She embroidered her name for free.
I just told her what size clothes H was wearing and then I think she just cuts down a regular towel to size.
I absolutely LOVE it and I'm sure H will too!!!

Wednesday, September 1, 2010

Coasters By Yours Truly...

...my sister went to pick up the coasters I made as a wedding gift. Here they are...ta-da!
You can click here to see the before pictures. It always amazes me how differently they look when they are glazed. Anyways, I love them and I hope the couple that's getting them do too!

Wednesday, December 16, 2009

Cute Teacher Gift...

...O.M.G!!! Is this not the cutest gift for a teacher or depending on the items you put inside the bottle, it could be for anyone...baby gift, neices/nephews, wedding gift. Click here for directions to see how easy it is!
Please post if you do one yourself!
PS
Happy three year anniversary of our first date Pretty!

Wednesday, December 2, 2009

DIY Ornament Wreath...

...so I came across the blog called The Pursuit of Happiness the other day. The post was for DIY Ornament Wreath. Hers turned out super cute and she had LOTS of ornaments on hers but I kind of spaced mine out because I didn't have that many. Here's what I came up with:

This one has gold garland but its hard to see with the flash. I think I'm going to give the gold one to my MIL because when we asked her what she wanted for Christmas, she just said a gift card. It's pretty easy to make (click on the blog link above for directions) but it was harder than I thought to get the ornaments on tightly which determines where they hang. Oh well! It was fun and I think it turned out cute. I also think they're great gifts for the person you have no idea what to get them or the person who has everyone (think grandmother, aunt, stepmother). Let me know what you think and post pics if you make one.